Last week I finally got around to doing two shelving projects I have had in my head for months. It feels good to get things organized and cross projects off my to-do list!
The first project was a super simple solution for all my makeup, perfumes, etc that are always all over the place. I bought three small wood crates at Michaels. These sell for about $6.99 each but I always get them on sale or with a coupon.
I spray painted two of them white and one of them gold them hung them up with 3M Command Picture Hanging Strips.
I am obsessed with these things. I know they are a little pricey but my gawd, they make hanging stuff so easy. And I can now hang pictures straight, so they are worth every penny.


I filled each shelf with makeup, perfumes, lip glosses, nail polishes, etc. Everything is so tidy now - I love it!

The second shelf project I tackled was a thrift store re-do and slightly more invoved than my crate shelving.
About six months ago, I bought this shelf at The Salvation Army for around $7. I hated the heart and knobby, country style hooks and trim but I loved the potential in all the little nooks and tiny shelves.

This is how I changed it - not anything difficult, just a little time consuming....
Step one - take off the ugly bits. I used a hand saw {not electric - my husband thinks a power saw would be "dangerous"} and cut off the top and bottom portions so I was left with a square shaped shelf.

Step two - sand. I used my electric sander to take off the old stain. Most of the little nooks were too small for the electric sander so I ended up sanding a lot of this piece by hand. It wasn't fun. Sanding by hand is time consuming.
Step three - stain. After the piece was completely sanded, I stained it with rust-oleum stain in sunbleached {the same stain I used on my Ikea hack dining table - love this color!}.
I put on a super light coat of stain, let it dry for several hours, then added a second coat and let it dry overnight.
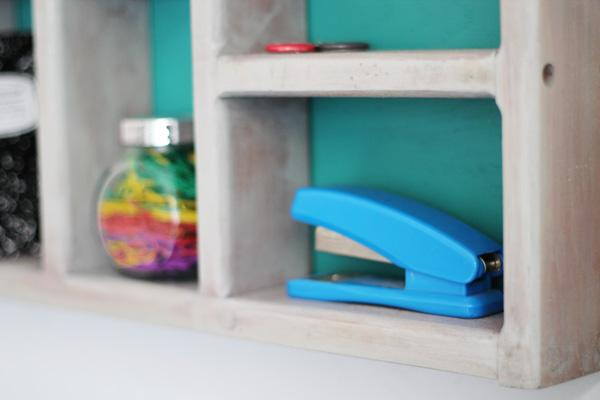
Step four - the back. In order to make a back for the shelf, I bought a square piece of plywood at Lowe's and cut it to the correct dimensions with my small dremel rotary tool {it works well when cutting thin pieces of wood}. After cutting the plywood, I painted it with teal paint that I had leftover from a previous project. I let the paint dry for a few hours, then used several small nails to attached the painted plywood to the back of the shelf.

Step five - hang. I didn't think 3M Command Strips would be strong enough for this heavy shelf, so I attached brackets to the back and hung it with good old fashioned nails.

I ended up hanging it to the left of my desk {above my printer} and it is the perfect piece for all those little things that end up collecting in my desk drawers or crowding my desktop.



Have you completed any thrift store re-do's lately? Or do you avoid buying thrifted "project" pieces? I try to avoid the project pieces but my imagination often gets the best of me.....it's a good thing we have a big garage :).


